
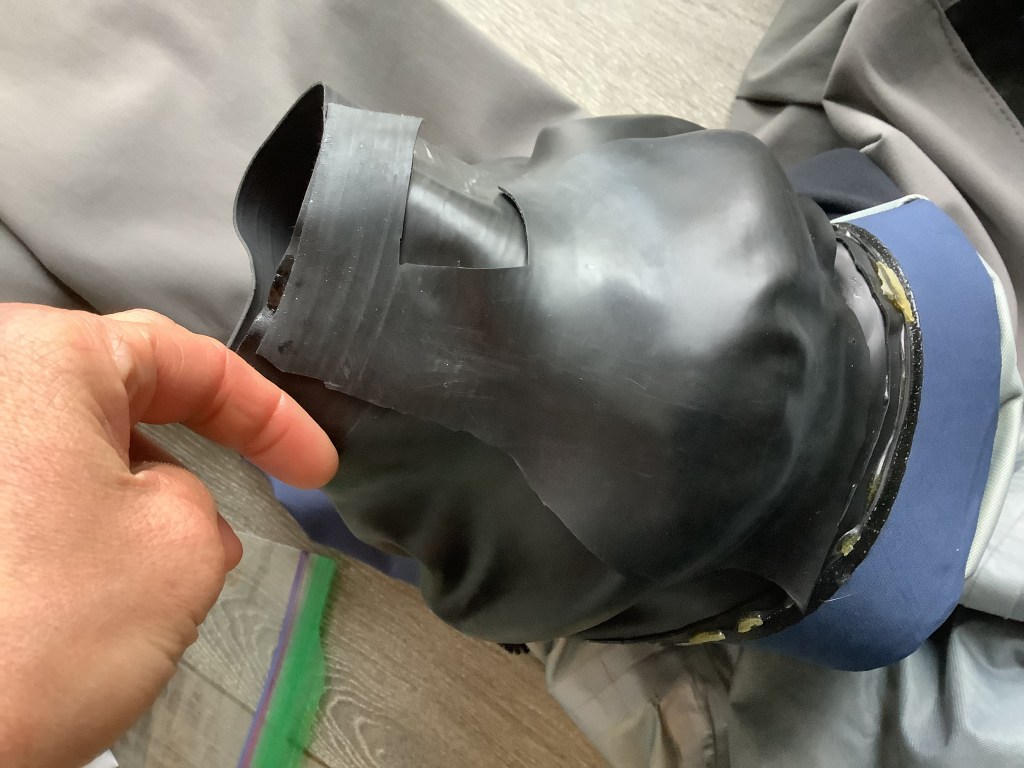
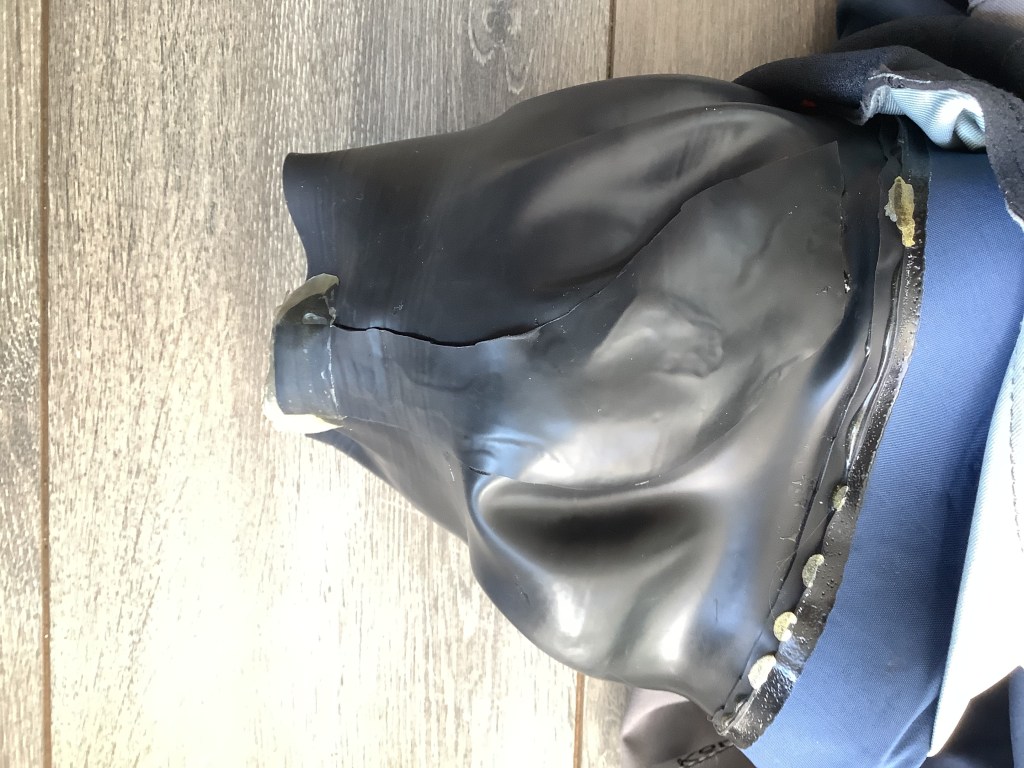
I was sliding my drysuit over my head last month, eager to get out for a Sunday paddle, when suddenly I felt the latex neck gasket give way… The result was what you see in the photo above: a 7.5-inch curving tear from neck opening almost to the base of the brand new gasket I had just installed the previous month. Sigh!
My paddle outing that day was a no-go, but a challenge had presented itself: how to repair this big, ugly tear so I could get back on the water as soon as possible.
Why not replace the gasket right away? Well, gaskets are in short supply around here, and it often takes weeks to locate, order and receive a new one. Plus, I’m used to repairing gaskets to prolong their life — I sweat a lot and my sweat is not friendly to latex gaskets. I go through them at a rate most paddlers find alarming. Repairs save me material and money. I had repaired gaskets several times before, but never a tear of this magnitude.
The good news? It is 100% possible (and not difficult) to successfully repair a massive tear like this one. My repair has been holding strong for a month of regular use, and I expect it to keep going for some time. Read on for how I did it!
Repairing a large tear in a neck gasket
Materials needed:
- Old neck gasket to use as a patch.*
- Aquaseal FD Repair Adhesive by Gear Aid
- Popsicle stick or other tool to spread Aquaseal
- Items to stuff inside your gasket to fill it out to its full shape
- Painters tape
- Fine grit sandpaper (220 or higher)
- Alcohol wipes
- Scissors
- Tenacious Tape Repair Tape by Gear Aid (optional)
* It’s a good idea to keep old gaskets around for patching purposes. Ask for your old gaskets back if you have new gaskets installed by a professional or a friend.
How to complete the repair:
- Turn the neck gasket inside out. Line the edges of the tear up as closely and evenly as possible (with no overlap) and tape in place using painters tape. The tape will hold the repair for gluing and prevent glue from seeping through to the inside of your gasket.
TIP: Place the tape on one half of the tear, then flip the gasket right side out and line the edges up from the right side, so you can see the seam.
TIP: It can be tricky to line things up around the natural bulge and taper of the gasket. Take your time. Precision will pay off!
TIP: When lining up the edges, favour a slight gap over an overlap. An overlap will create an uneven edge that can catch on your skin and allow water to enter your drysuit when you don’t want it to.

- Turn the gasket right side out, and clean along and around the tear line with an alcohol wipe to remove oils and dirt. Allow to dry.
- Lightly scuff the latex around the tear line with fine grit sandpaper. Wipe again with an alcohol wipe to remove the residue. Allow to dry.
- Using an old gasket, cut an oversize patch for the tear. Make the patch larger than you need on all sides except the upper edge (rim) of the gasket, where it should be flush. Clean the side of the patch that will sit over the tear with an alcohol wipe and allow to dry.
TIP: I used a section of the full depth of an old neck gasket, aligned so the patch and the torn gasket had a similar shape (ie. the taper and bulge in the gasket matched the taper and bulge in the patch).
- Apply Aquaseal all along and over the tear line. Be liberal. Press the Aquaseal over and into the crack itself, to fill and bind any small gaps in the join, and spread it a good 1/2″ from the tear line on either side and at the end. Allow to set for a few minutes.
TIP: I used a popsicle stick to spread my Aquaseal.

- Place the gasket patch over the tear line, slide it into place so the top edges align, then press firmly across the full length and width of the tear line. You want to ensure all the Aquaseal is firmly squeezed against the patch so it adheres well along the entire area.
TIP: Once you’ve pressed everything down, stick some painters tape along the edges of the patch to hold things in place.

- Stuff the gasket to support the repair while it cures. Fill the gasket with items that firmly push it out to its full dimensions in the area of the patch. (I used socks and a mini football.)
TIP: Don’t skip this step! If you do, the gasket will bend and buckle and the patch could pull away from the gasket during the cure time, leaving you with gaps and holes along your seam. Not good!

- Leave still and allow to cure. Aquaseal specifies a cure time of 8 to 12 hours. Err on the longer side if you can.
- Once the glue has cured, trim the patch down to size: cut with scissors about 1/4″ to 1/2″ away from the glued edges. Be careful not to cut the gasket!
TIP: If any areas of your patch need reinforcement, apply more Aquaseal under the trimmed edges of the patch, press firmly in place, tape the edges down with painters tape, and allow to cure. - Voila! The repair is complete!
TIP: Continue reading below for extra add-ons…

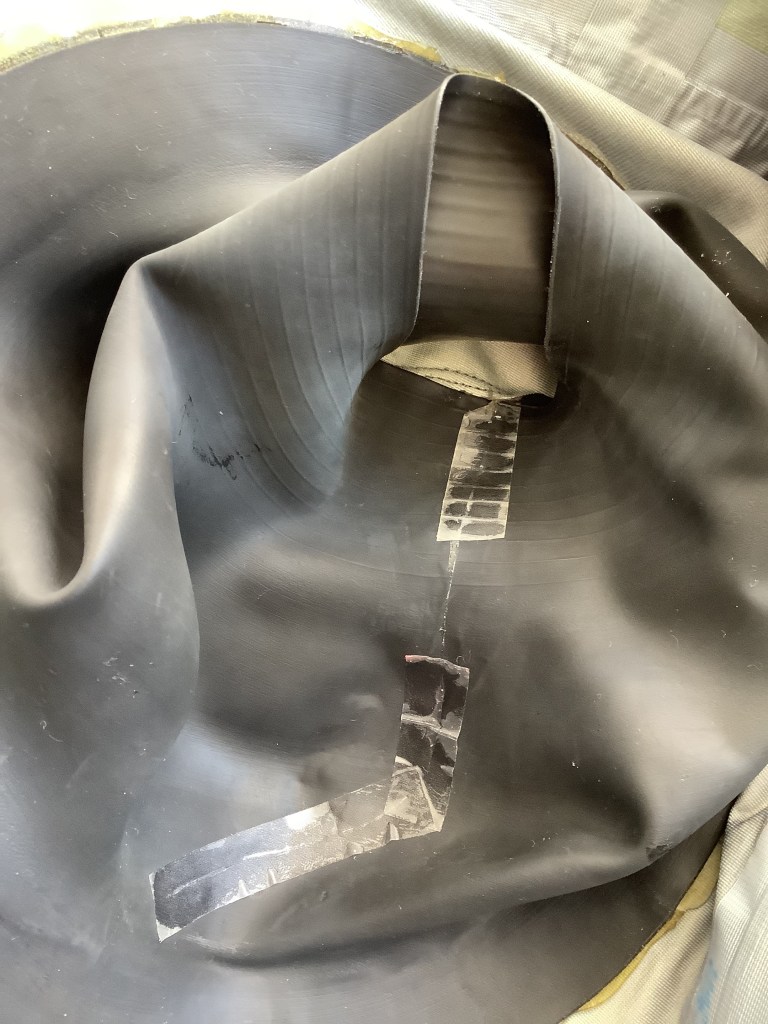
- EXTRA #1: I placed strips of Gear Aid Tenacious Tape along the seam line inside the gasket to prevent the cured Aquaseal — which smells and off-gases for a while — from touching and rubbing against my skin.
TIP: It helps to clean the seam with an alcohol wipe before applying the tape!
- EXTRA #2: After one or two uses, I had to reinforce the repair along the top edge of the gasket. There is a lot of “pull tension” here when the gasket is stretched over your head, and the repair was starting to pull apart in this spot (aka, “the spot where it all began”)! To fix that, I cut and glued a wider, oval-shaped piece of Tenacious Tape across the top edge of the repair (on the outside only) to provide a greater area of support around the top edge of the tear site. This additional repair has held well — although the edges of the extra patch are starting to come up now. Replacing or regluing that patch will lengthen the repair’s life.
TIP: Glue this patch in place with Aquaseal!

A few more extras:
- Do all your patching and gluing on the outside of the gasket to keep the inside of the gasket, where it rests against your neck, as smooth and irritant-free as possible. This is especially relevant at the top edge of the tear! I don’t recommend folding tape or a gasket patch over the lip of the gasket and gluing to both the inside and outside of the gasket, as this prevents the gasket from lying flush against your skin and creates small openings for water to seep in during rescues, rolling, etc.
- When buying new gaskets, check the manufacture date stamped inside the gasket (for Kokatat brand gaskets; unsure if other brands use the same date stamp). Buy gaskets that have the most recent date. The longer gaskets sit around (and are possibly exposed to light, dry air, etc.) the less integrity and life they have when you put them on your drysuit.
